Do not follow this guide if you have ordered your YubiKey from SSL.com and the certificate installed in it is non-expired. YubiKeys ordered from SSL.com are shipped with certificates pre-installed and there are no additional configurations needed for a token containing a non-expired certificate .
For the purposes of code signing and Adobe PDF digital signatures, it is required that your private key be securely generated and stored on an external FIPS-validated hardware device rather than your computer. Users can generate a key pair on an existing YubiKey and an attestation certificate that proves that the private key was generated on the device. The attestation certificate can then be used to obtain certificates from SSL.com that may be installed manually on the YubiKey.
An attestation certificate is only valid for one YubiKey. If you need to install your certificate in multiple YubiKeys, you will have to perform an attestation for each token. Please contact support@ssl.com to get more details about multiple issuances of a certificate.
This how-to will walk you through:
- Generating a key pair and attestation certificate on on your Yubikey
- Verifying the attestation certificate and associating it with an SSL.com EV code signing or PDF document signing order
- Installing your new certificate in the YubiKey
Yubikey users currently have two options to create the key pair: Yubikey Manager GUI or Yubico Authenticator GUI. Instructions are written for both.
Take note though that Yubikey Manager GUI will reach its end of life on February 19, 2026 per Yubico’s announcement. The Yubikey Manager CLI, however, will continue to function and will still be the tool used in generating the attestation certificate.
Important: After February 19, 2026, SSL.com customers will follow this procedure:
1. To generate the key pair and install/manage the digital certificate, Yubico Authenticator GUI will be used.
2. To generate the attestation certificate, Yubikey Manager Command Line Interface will be used. Take note that the Yubikey Manager CLI is part of the download package and can be found in the Yubico folder in your computer.
apt-get (see Yubico’s instructions for more information). A Linux AppImage is also available from the YubiKey Manager download page. Also note that while these instructions use YubiCo’s Yubikey Manager software, the 3.0 release of SSL.com’s SSL Manager supports keypair generation and certificate installation on YubiKey for Windows users.Requirements
- Latest version of Yubikey Manager or Yubico Authenticator installed.
- A Yubikey with a configured PIN and PUK: https://docs.yubico.com/yesdk/users-manual/application-piv/pin-puk-mgmt-key.html
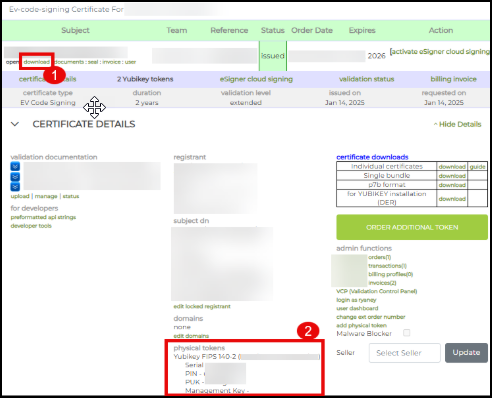
- If your YubiKey was ordered from SSL.com and you need to replace an expired signing certificate, you can refer to your PIN and PUK by logging in to your SSL.com account. Click the Orders tab, locate your certificate order and click the download link to display the details of your certificate. Scroll down to the physical tokens section where the values for your YubiKey’s PIN and PUK are indicated. Make sure to also save your PIN and PUK on a Password Manager.

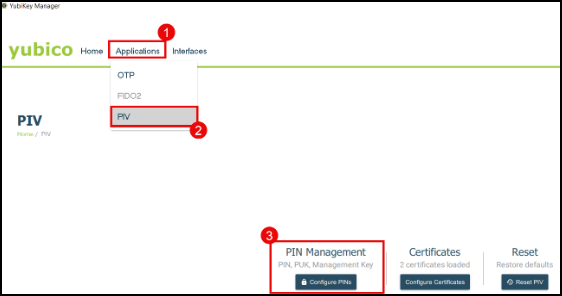
- If your Yubikey token was purchased from Yubico, you will need to set your PIN and PUK. To do this, open Yubikey Manager and click the Applications tab. Select PIV. Under the PIN Management section, click the Configure PINS button.

- If your YubiKey was ordered from SSL.com and you need to replace an expired signing certificate, you can refer to your PIN and PUK by logging in to your SSL.com account. Click the Orders tab, locate your certificate order and click the download link to display the details of your certificate. Scroll down to the physical tokens section where the values for your YubiKey’s PIN and PUK are indicated. Make sure to also save your PIN and PUK on a Password Manager.
Step 1: Generate Key Pair on YubiKey
1a: Using Yubikey Manager
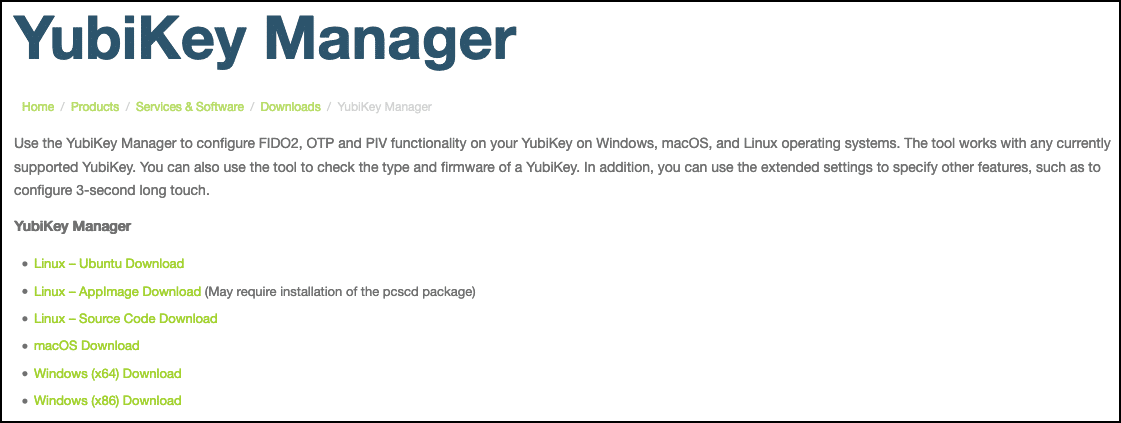
- If you have not done so already, download and install YubiKey Manager from Yubico’s website. Versions for Windows, Linux, and macOS are available.

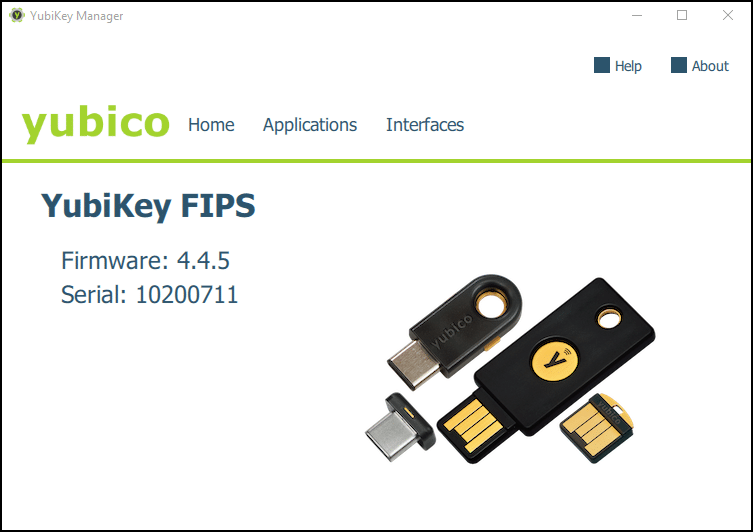
- Plug in your YubiKey, then launch YubiKey Manager. Your YubiKey should be displayed in the YubiKey Manager window.
Note: If your token is not being displayed on Yubikey Manager, try to close the application. Right-click it with your mouse, and choose Run as an administrator.

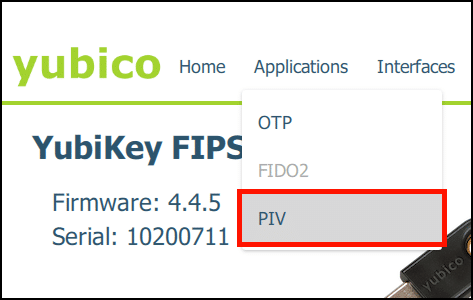
- Navigate to Applications > PIV.

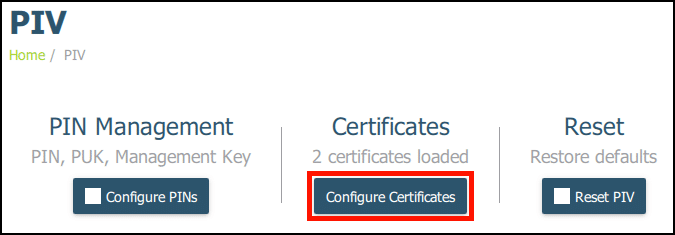
- Click the Configure Certificates button.

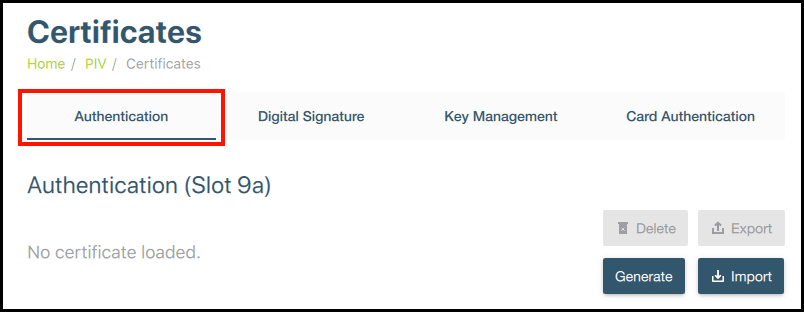
- Select the tab for the YubiKey slot where you would like to generate the key pair. If you are buying an EV code signing certificate, choose Authentication (slot 9a). For PDF document signing, choose Digital Signature (slot 9c). (See Yubco’s documentation for more information on the various key slots and their intended functions; they differ in their PIN entry policies). Here we are going to use slot 9a.

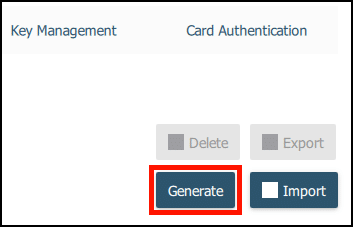
- Click the Generate button.

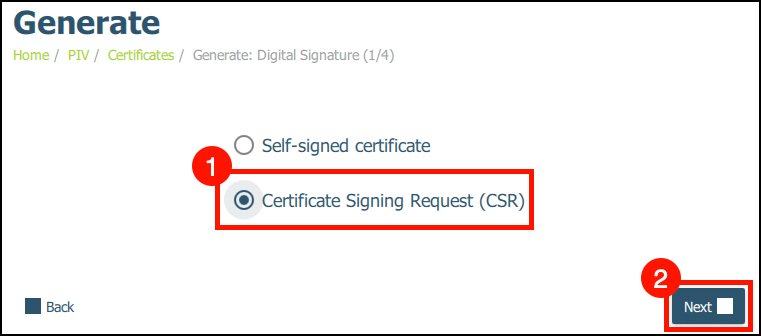
- Select Certificate Signing Request (CSR), then click the Next button.

- Select an Algorithm from the drop-down menu. For document signing, choose
RSA2048. For EV code signing, chooseECCP256orECCP384.

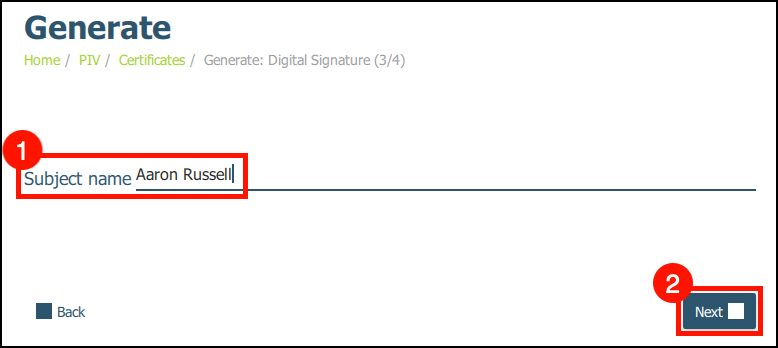
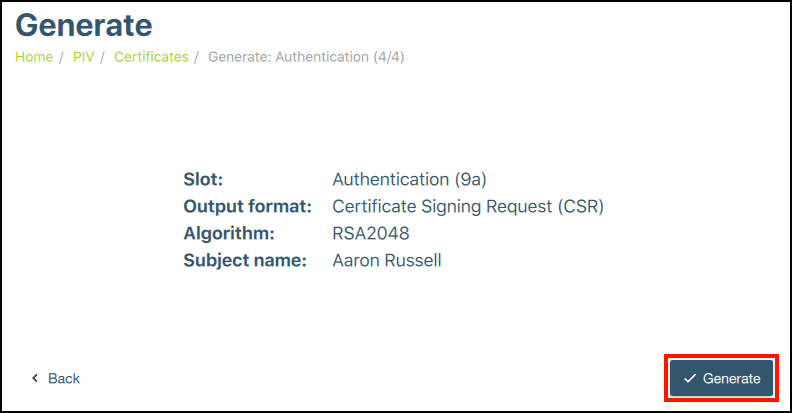
- Enter a Subject Name for the certificate, then click the Next button.
Note: We won’t actually be using this CSR—it’s generated as a byproduct of creating a new key pair. So, it doesn’t really matter what you enter for the Subject Name here. Users must ask SSL.com for a new issuance when submitting a new order, the issuance will not happen automatically. This can be done by contacting support@ssl.com
 - Click the Generate button.

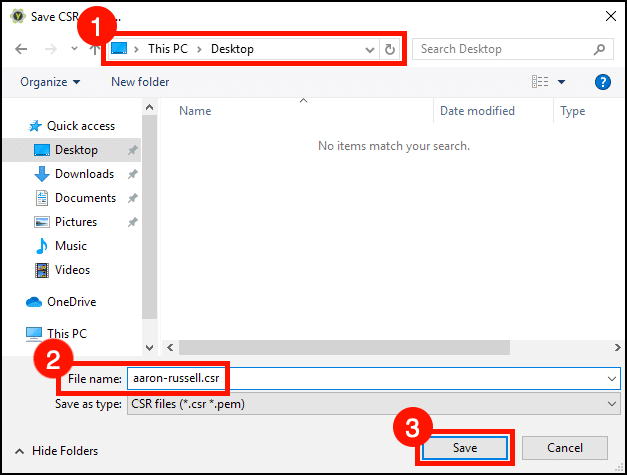
- Select a location to save the CSR file, create a filename, then click the Save button.

-
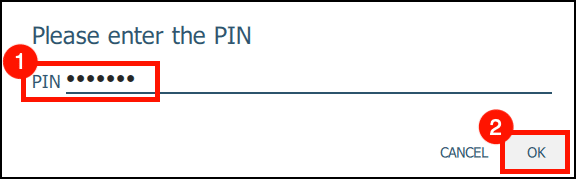
Enter your YubiKey PIN, then click OK. If you need help finding your PIN, refer to the instructions provided in the Requirements section at the top of this article.

- The CSR file will be saved in the place you specified in step 11, above. Yubikey Manager will also flash a message indicating the CSR was successfully generated. Again, we don’t need this file to proceed and you can safely delete it.


1b: Using Yubico Authenticator
- Download Yubico Authenticator.
- Plug in your YubiKey, then launch Yubico Authenticator.
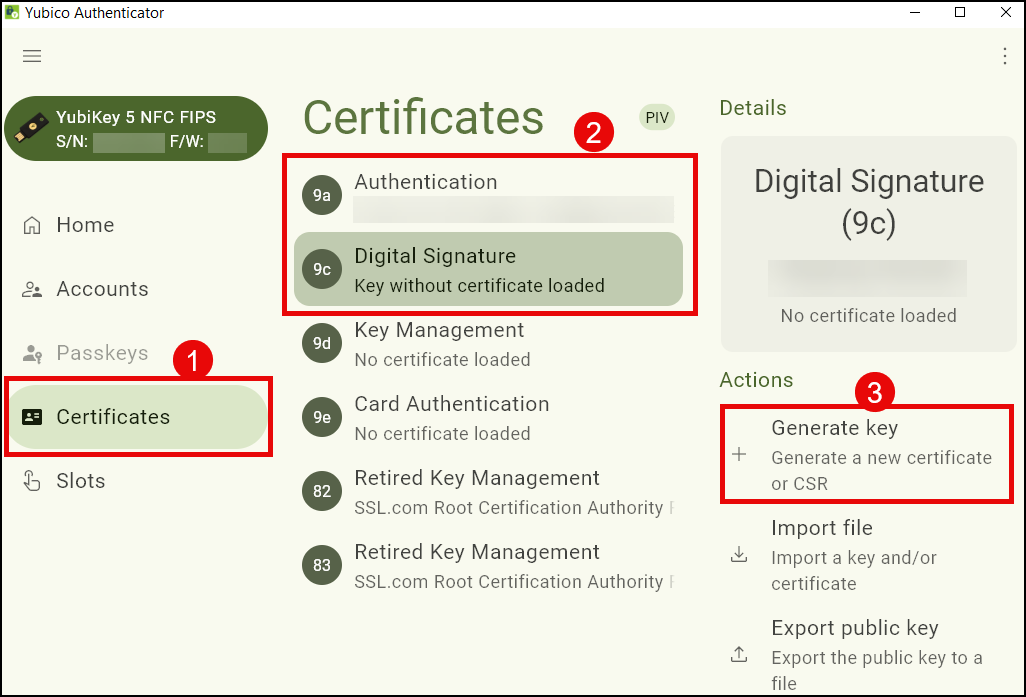
- Under the Certificates section, select the tab corresponding to the YubiKey slot where you intend to generate the key pair. For a code signing certificate, select Authentication (slot 9a). For signing PDF documents, select Digital Signature (slot 9c).
(Refer to Yubico’s documentation for detailed information on key slot purposes and PIN entry requirements, which vary by slot.)
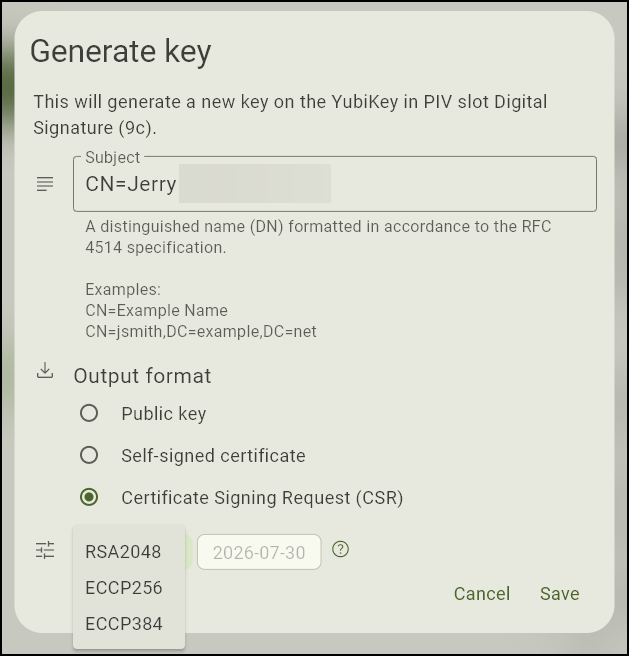
In this example, we’ll use slot 9c. Click on Generate Key to proceed.

- Input a Subject Name for the certificate in accordance with the instructions provided by Yubico Authenticator.
For Output Format, choose Certificate Signing Request (CSR).
From the Algorithm drop-down list, make a selection. Use RSA2048 for document signing. For code signing, opt for ECCP256 or ECCP384.
Finally, click the Save button.

- Save the CSR certificate in a folder.


Step 2: Generate Attestation Certificate
Each YubiKey comes pre-loaded with a private key and certificate from Yubico that allows you to generate an attestation certificate to verify that a private key has been generated on a YubiKey. This operation will require you to use the ykman Command Line Interface (CLI) that is installed when you download Yubikey Manager.
- In Windows, open PowerShell as an administrator. macOS and Linux users should open a terminal window on their device.

- Use the following command to navigate to the YubiKey Manager files and access ykman
- Windows:
cd "C:\Program Files\Yubico\YubiKey Manager"
- macOS:
cd /Applications/YubiKey\ Manager.app/Contents/MacOS
- On Linux (Ubuntu), the
ykmancommand will already be installed in yourPATH, so you can skip this step.
- Windows:
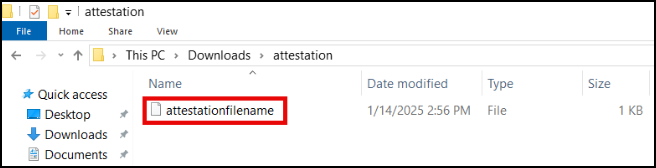
- Using PowerShell, the command below will generate an attestation certificate. Choose/create a folder in your computer where you want the attestation certificate to be stored and then think of a name you want to use for the certificate. Make sure to choose names that are simple and single-worded to avoid errors when entering the command on PowerShell. For example, the name of your folder could be attestation and the name you want to use for the attestation certificate could be attestationfilename. The path that you would include in the command would then be something like: C:\Folder\Folder\attestation\attestationfilename. After entering the command on PowerShell, check in your chosen computer folder if the attestation certificate was successfully generated.
- Windows:
.\ykman.exe piv keys attest 9a C:\Folder\Folder\attestation\attestationfile
- Linux (Ubuntu):
ykman piv keys attest 9a ATTESTATION-FILENAME.crt
- macOS:
./ykman piv keys attest 9a ATTESTATION-FILENAME.crt

- Windows:
- Next, use the
ykmancommand to export the intermediate certificate from slot f9 of the YubiKey. Choose/create a folder in your computer where you want the intermediate certificate to be exported. Replace C:\Folder\Folder\attestation\intermediatefilename with the path and filename you want to use):- Windows:
.\ykman.exe piv certificates export f9 C:\Folder\Folder\attestation\intermediatefilename
- Linux (Ubuntu):
ykman piv certificates export f9 INTERMEDIATE-FILENAME.crt
- macOS:
./ykman piv certificates export f9 INTERMEDIATE-FILENAME.crt
- Windows:

Step 3: Verify Attestation Certificate with SSL.com and Attach to Order
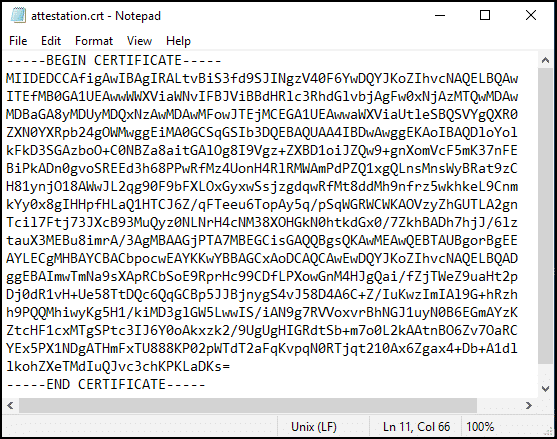
- Here we are going to use our attestation certificate from YubiKey slot 9a with an EV code signing certificate order. (The procedure for document signing certificates is the same.) First, open the attestation and intermediate certificates in a text editor.

- Login to your SSL.com user account and navigate to the Orders tab, then click the details link for the order you wish to associate with the attestation certificate. (This link will change to download after your certificate is issued.)
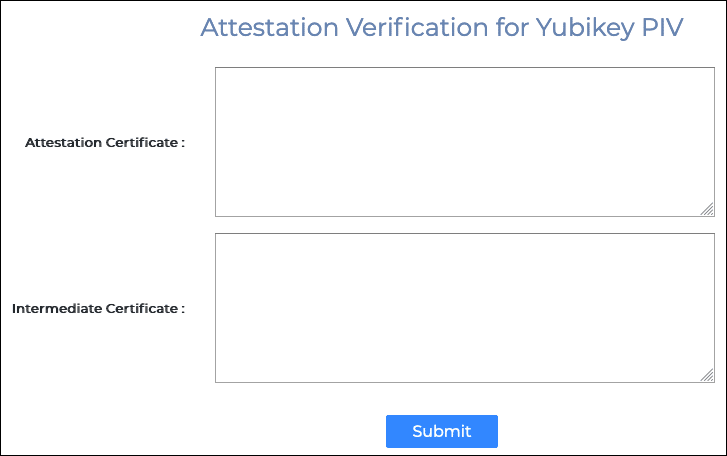
Note: If you wish to check the validity of your attestation certificate without attaching it to an order, you can use SSL.com’s attestation verification tool.
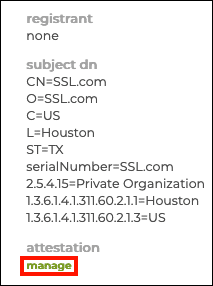
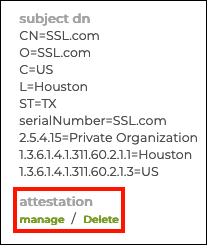
- Click the manage link, under attestation.

- A new page with fields for the attestation and intermediate certificates will appear.

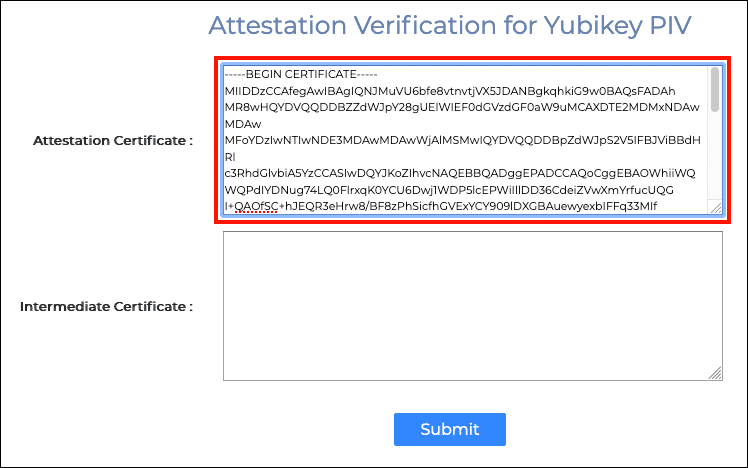
- Paste the attestation certificate into the Attestation Certificate field, making sure to include the lines
-----BEGIN CERTIFICATE-----and-----END CERTIFICATE-----.

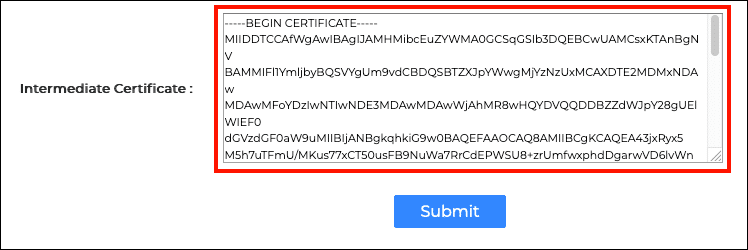
- Next, paste the intermediate certificate into the Intermediate Certificate field.

- Click the Submit button.

- If everything has gone correctly, a green alert will appear at the top of the screen, indicating a successful attestation.

- Return to the order in your account. You can verify that the attestation has been added to the order by the presence of a link labeled Delete under attestation.

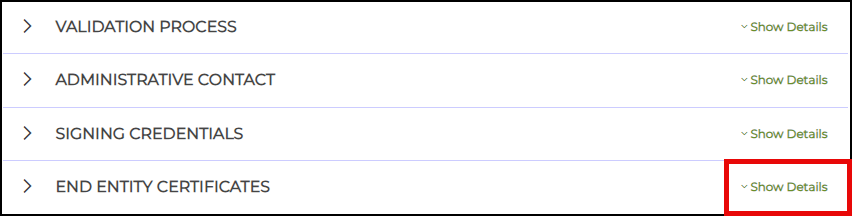
- After SSL.com processes your order, the certificate will be available in your SSL.com account. From your order details page, scroll down to END ENTITY CERTIFICATES section and click Show Details.

- Scroll down to the subsection labeled Code Signing Certificate or Document Signing Certificate, depending on your order. To the right, you will see the download links for your certificate.
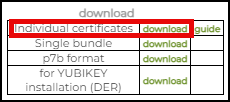
- If you have a Document Signing Certificate, choose the individual certificates download option. This is a zip file containing three certificate files: your end-entity certificate, an intermediate certificate, and a root certificate.

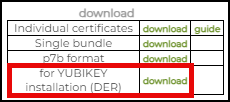
- If you have a Code Signing Certificate, choose the for YUBIKEY installation (DER).

- If you have a Document Signing Certificate, choose the individual certificates download option. This is a zip file containing three certificate files: your end-entity certificate, an intermediate certificate, and a root certificate.
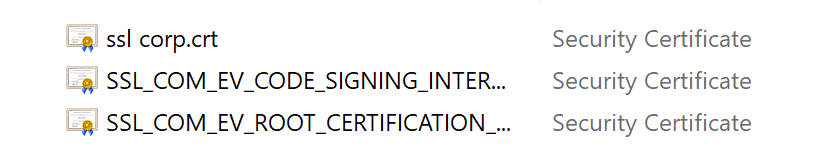
- Expand the zip file. There should be three certificate files: your end-entity certificate, an intermediate certificate, and a root certificate.


Warning: We have seen error messages in recent versions of YubiKey Manager when importing ECC certificates (now required for EV Code Signing on YubiKey). There are two potential workarounds:
- Recommended: Convert the certificate to DER format before importing. This is a straightforward conversion with OpenSSL (replace
CERT.crtandCERT.derwith your actual filename in the following command):
openssl x509 -outform der -in CERT.crt -out CERT.der - If you cannot convert your file, reverting to an earlier release of YubiKey Manager will also work. The most recent version we have found to successfully import ECC
.crtfiles downloaded from SSL.com is1.1.5.
Step 4: Install Certificate in YubiKey
Step 4a: Install Certificate Using Yubikey Manager
- Launch YubiKey Manager and mavigate to Applications > PIV.
- Click the Configure Certificates button.
- Select the tab for the same YubiKey slot where you generated the key pair.
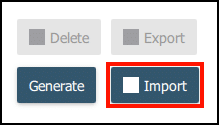
- Click the Import button.

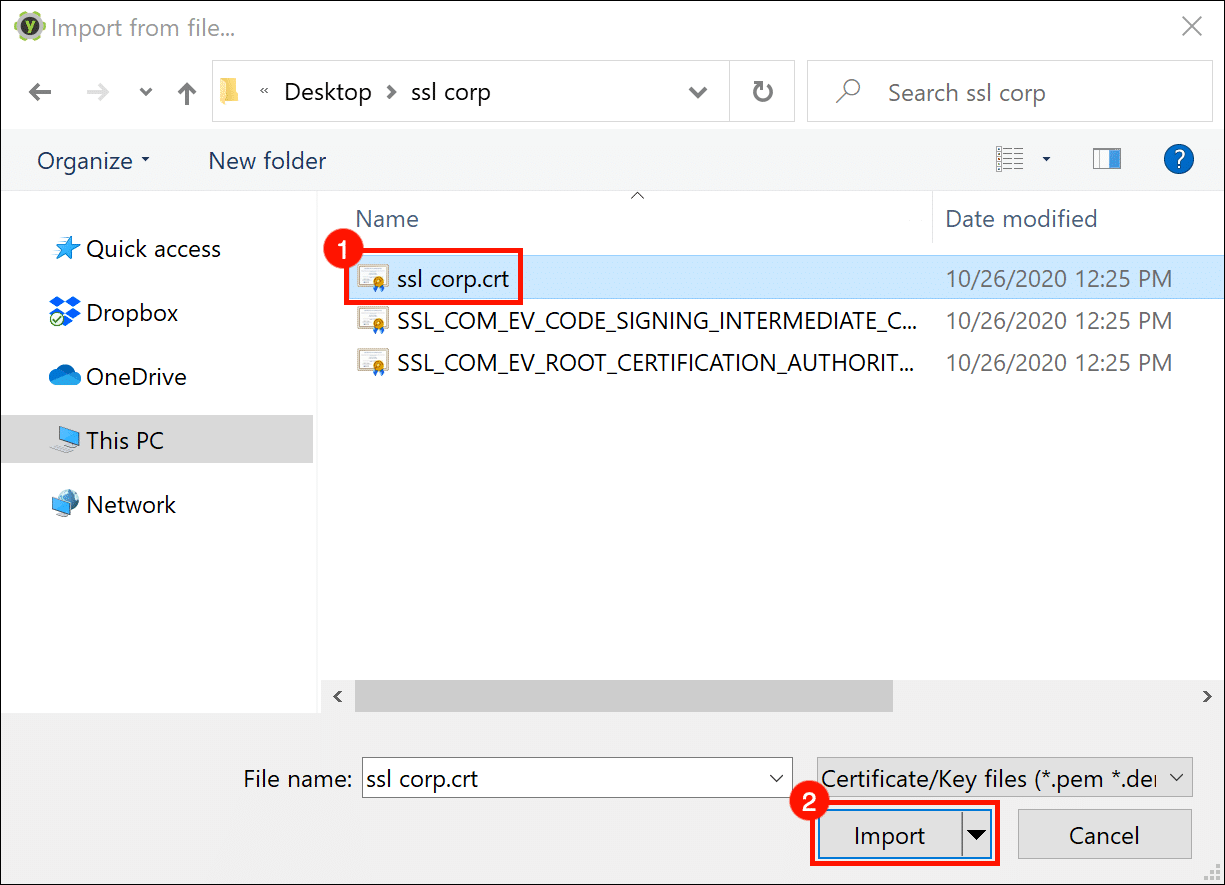
- Navigate to your end-entity certificate file and click the Import button.

- Enter your YubiKey’s management key, then click OK. If you need your management key, please contact Support@SSL.com.

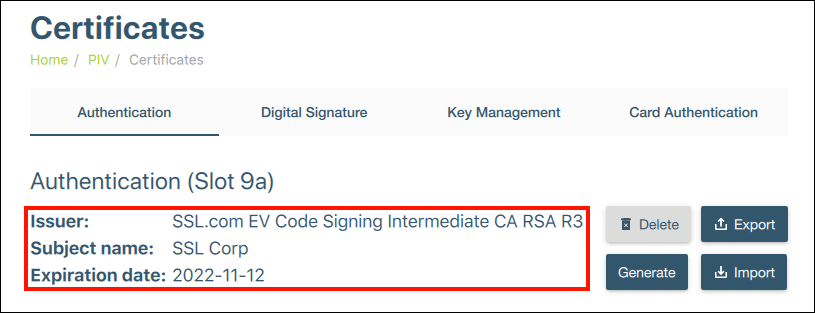
- The new EV code signing certificate is installed in the YubiKey.

- To make sure your digital signatures are trusted on all computers, you should also install the root and intermediate certificates on your YubiKey for a complete chain of trust. Please follow these instructions for root and intermediate installation: Install SSL.com Root and Intermediate Certificates on YubiKey.
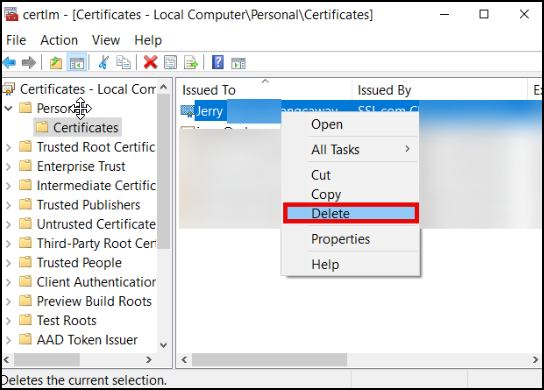
- Optional step: If you are a customer who replaced an expired certificate in your Yubikey, you will also need to delete the copy of the expired cert that is still in the Windows certificate store. To do this, type certmgr on the Windows search bar of your computer. Next, click Manage computer certificates. Click the Personal folder, locate the expired signing certificate, right-click it with your mouse, and choose Delete.


Step 4b: Install Certificate Using Yubico Authenticator
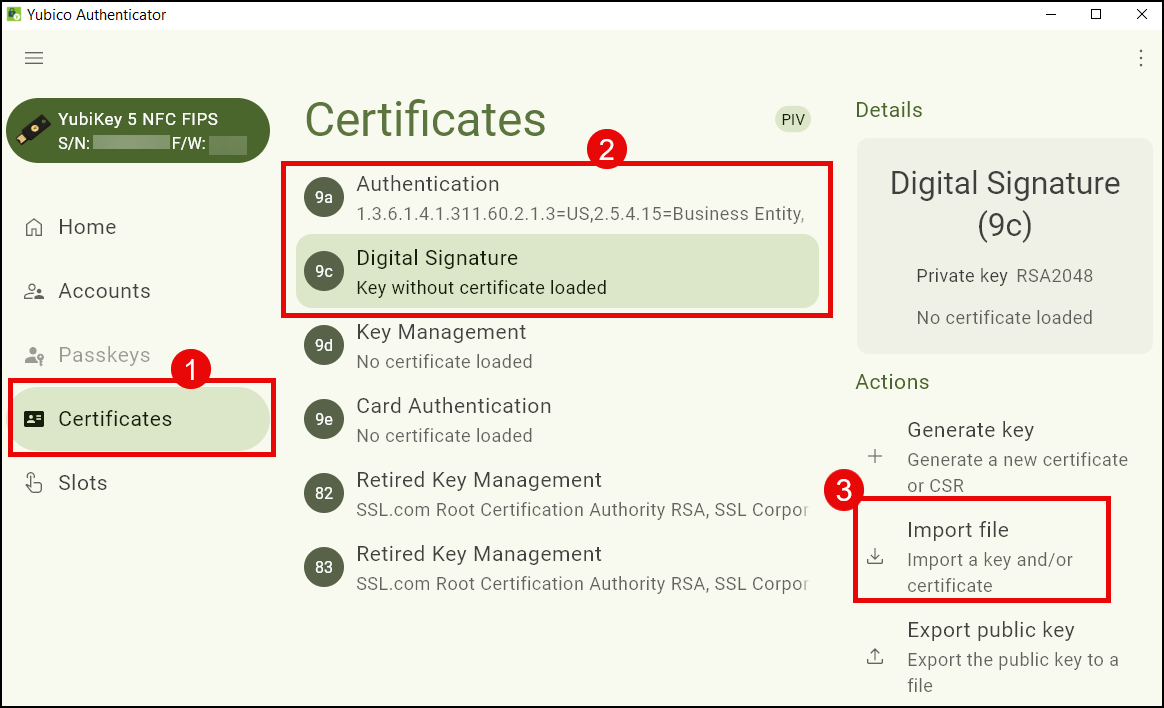
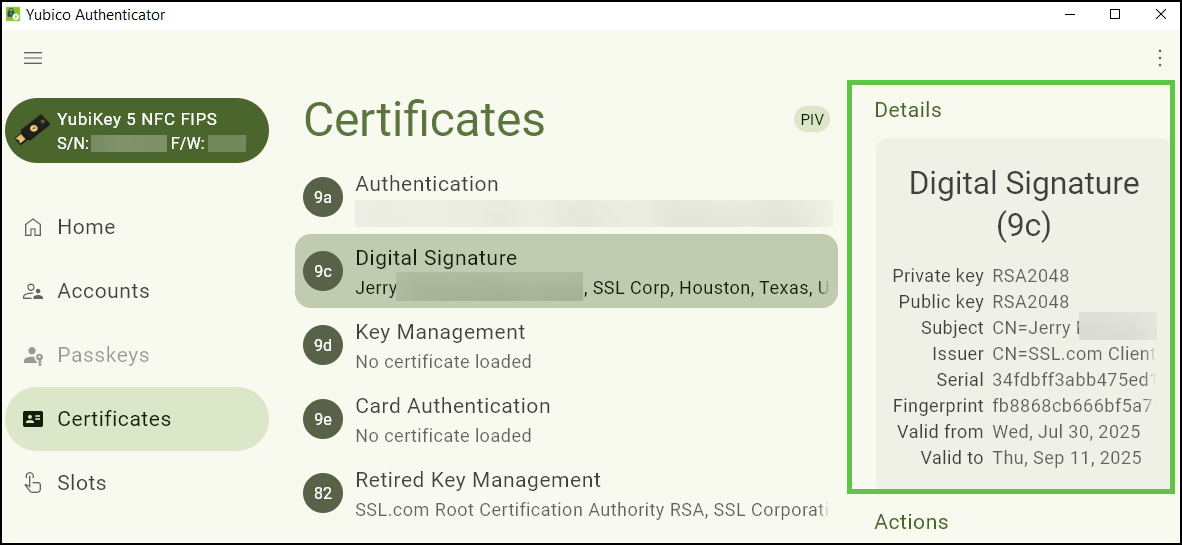
- Open Yubico Authenticator
- Click Certificates, followed by Digital Signature, and Import file.

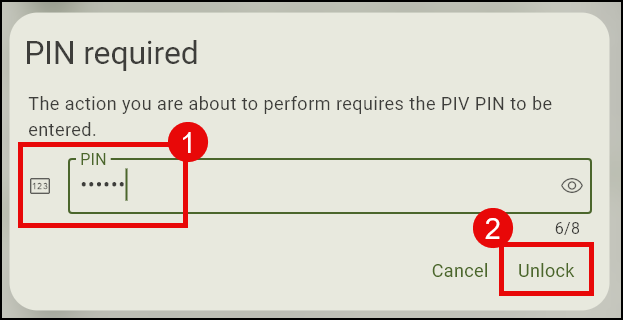
- Enter your Yubikey PIN.

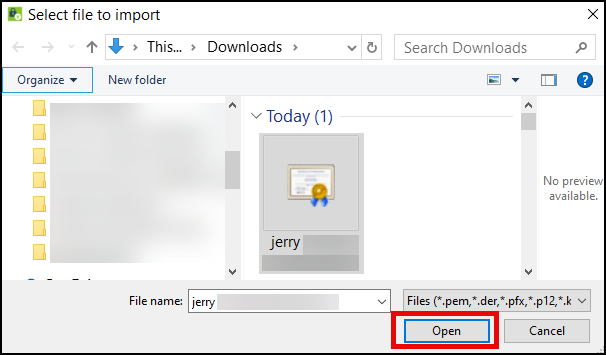
- Select the file to import.

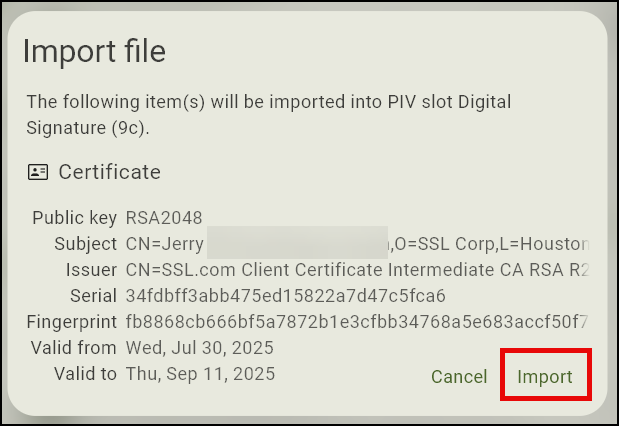
- Click Import button.

- Your certificate is successfully installed.